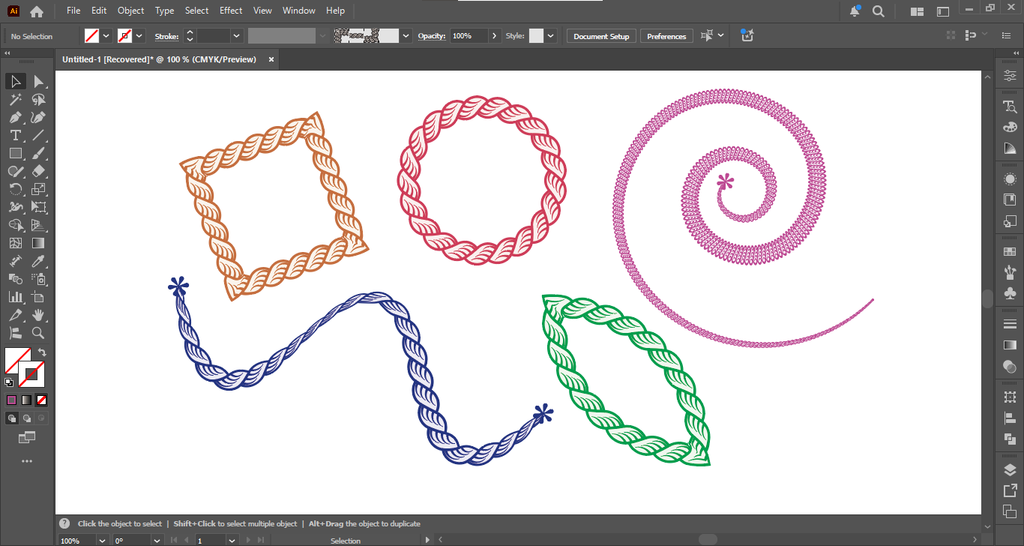
How to Make a Rope Pattern Brush in Adobe Illustrator
A step-by-step tutorial: draw one leaf, repeat it into a braided rope, and turn it into a reusable Pattern Brush.
A rope brush lets you add a braided border to any shape in seconds: circles, frames, badges, logos, or a simple line. In this tutorial you build the rope from a single leaf shape and save it as a Pattern Brush you can reuse in any project.
What you need: Adobe Illustrator (any recent version) and about 10 minutes.
What you will make: a black-and-white braided rope that you can recolor with one click.
Before you start
- Create a new document (1000*1000px).
- Open these panels from the Window menu: Align, Pathfinder, Stroke, Color and Brushes.
- Keyboard shortcuts below are for Windows. On Mac, use Cmd instead of Ctrl and Option instead of Alt.
Step 1: Draw the leaf shape
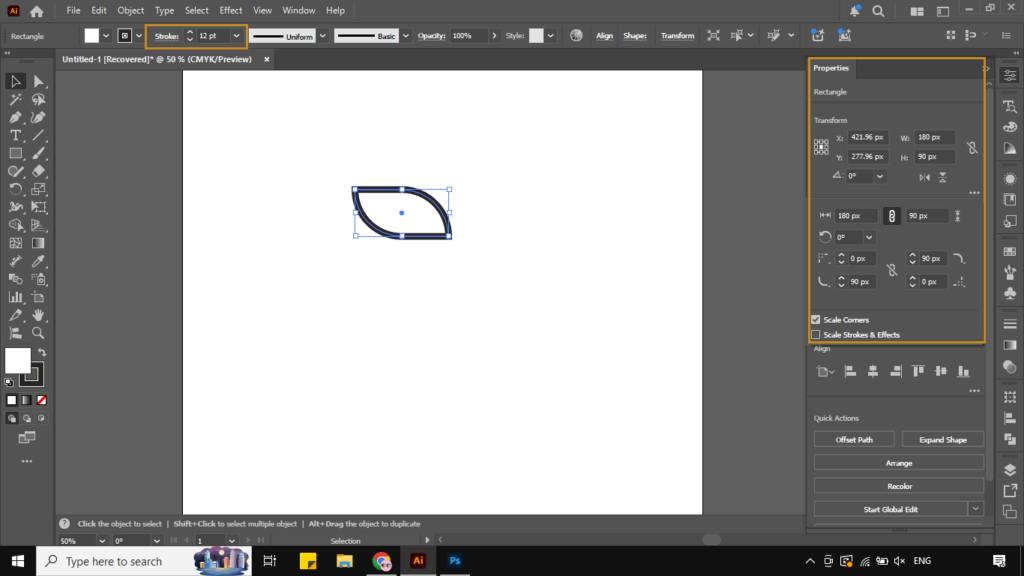
- Select the Rectangle tool (M) and click once on the artboard.
- In the dialog, enter a small size, for example 180 × 90 px, and click OK. These numbers are a starting point; change them to make a fatter or slimmer leaf.
- With the rectangle selected, drag the small corner widgets inward to round two opposite corners as far as they will go. Leave the other two corners sharp. The result looks like a leaf.
- Remove the fill, set the stroke to black, and make the stroke thick (about 12 pt) so the shape is easy to see.
Step 2: Add tapered stripes
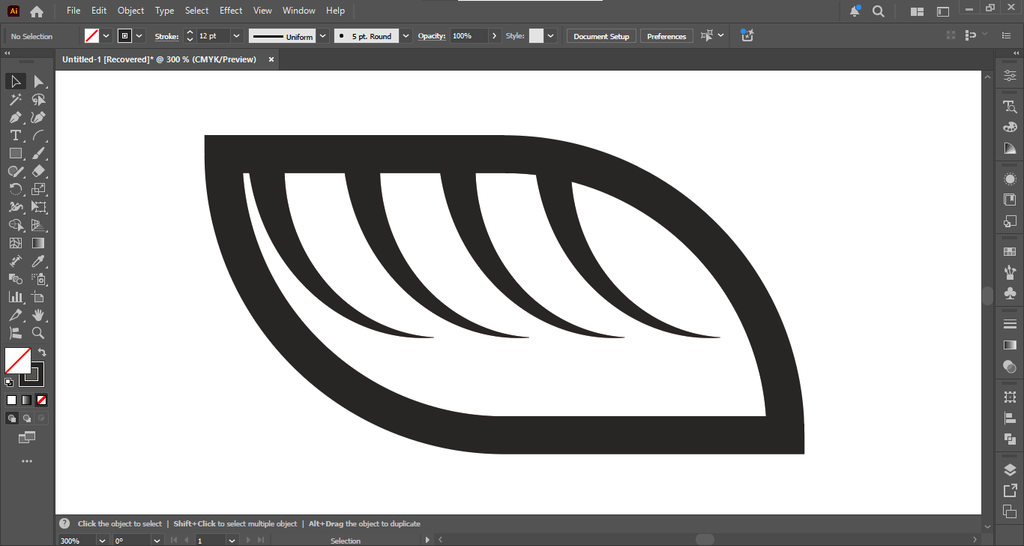
- Choose the Arc tool. It sits in the same toolbar group as the Line Segment tool (click and hold to find it).
- Drag to draw a curved stripe inside the leaf. Repeat until you have about four stripes that follow the leaf’s curve.
- Select all the stripes, open the Align panel (Shift + F7), and use the Distribute buttons to space them evenly.
- Open the Stroke panel and open the Width Profile drop-down. Choose a tapered profile so each stripe is thick in the middle and thin at the ends.
Step 3: Set the colors
- Open the Color panel (F6).
- Double-click the fill swatch to open the Color Picker.
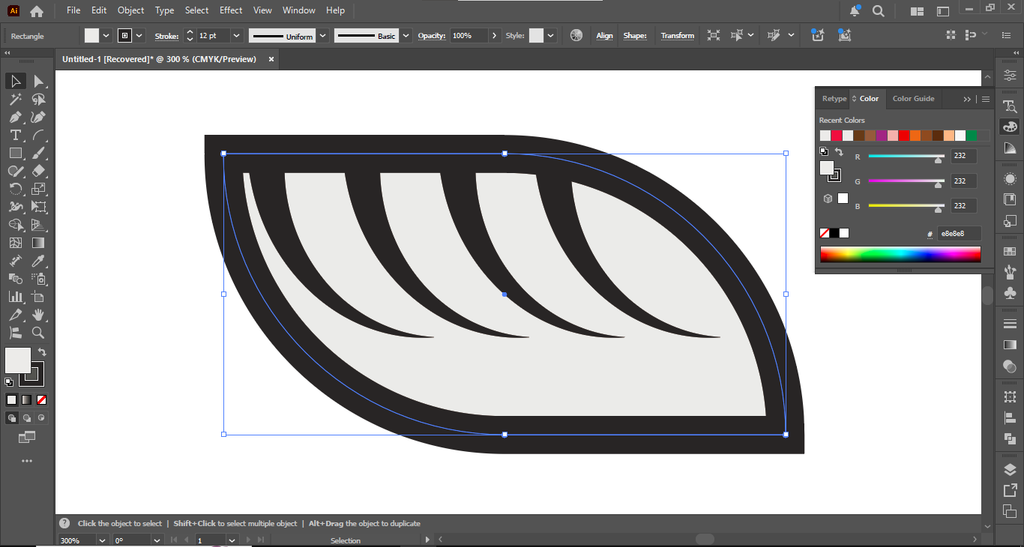
- Enter a light gray such as #E8E8E8 as the fill color and click OK. The light fill keeps the stripes readable against the black outline.
Step 4: Outline the stroke
This step turns the thick lines into real filled shapes, so the tapers stay exactly as drawn when you copy and scale the leaf.
- Select the whole leaf (outline and stripes).
- Go to Object > Path > Outline Stroke.
Step 5: Rotate, copy, and align the leaves
- With the leaf selected, rotate it 45 degrees. Hold Shift while you drag a corner of the bounding box so it snaps to 45-degree steps.
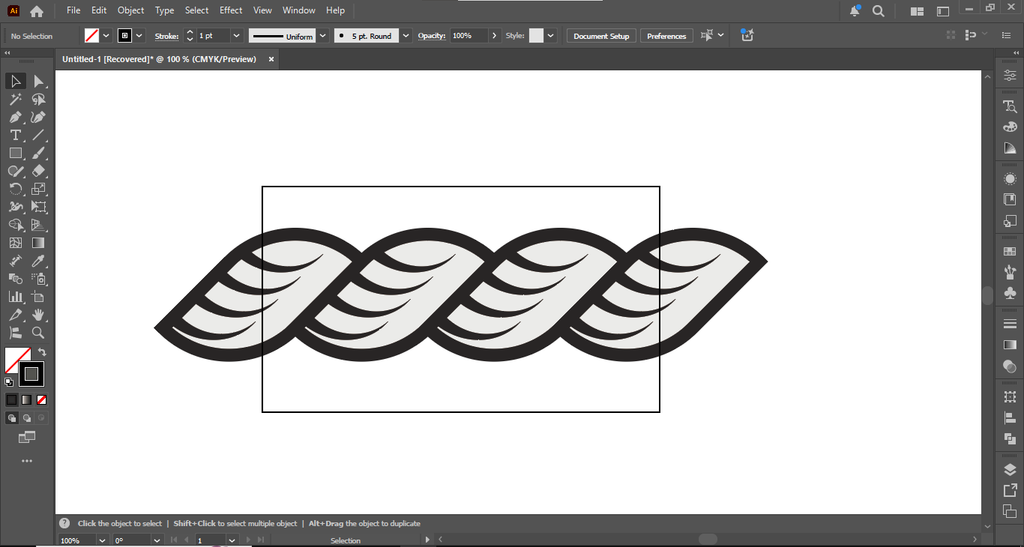
- Hold Alt and drag the leaf sideways to make a copy. Place the copy so the two leaves overlap slightly, like the twist of a rope.
- Repeat until you have a row of about four leaves. Zoom out if you need more room.
- To check alignment, draw a thin guide line with the Line Segment tool (\) across the middle of the row and make sure each leaf sits on it.
- Select all the leaves and use the Align panel (Shift + F7) to center them vertically. Nudge any leaf that looks off until the braid looks even.
- Convert the shapes into plain paths with Object > Expand if the option is available. You should see a short “Shape Expanded” message.
Step 6: Clean up with Pathfinder
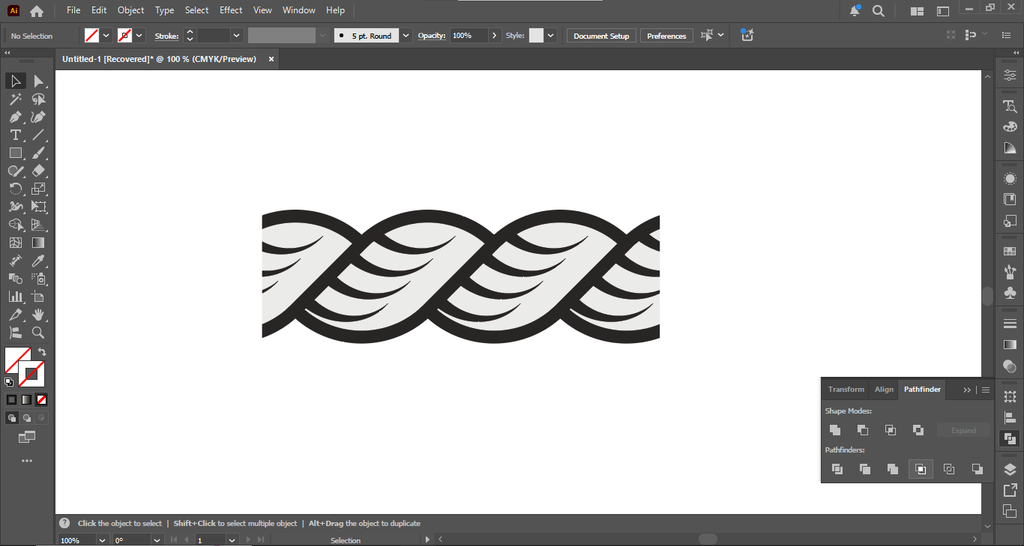
- Select the whole row of leaves.
- Open Pathfinder (Ctrl + Shift + F9).
- Choose the Pathfinder operation that gives you one clean rope shape. In this tutorial, the leaves end up as a single clean, black braided strip with no stray overlaps.
- Zoom in and check that the left and right ends are clean. The first and last leaf should look like they continue the pattern, so the rope repeats smoothly when it is stretched along a path.
Step 7: Create the Pattern Brush
- Select the finished rope.
- Open the Brushes panel (F5).
- Drag the rope into the panel. The New Brush dialog opens.
- Choose Pattern Brush and click OK.
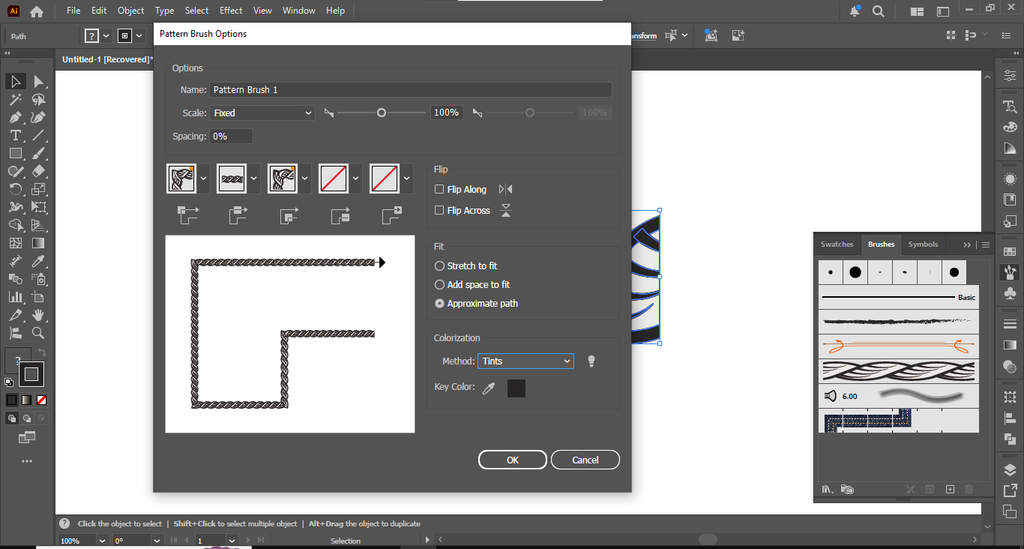
- In Pattern Brush Options, set:
- Name: Rope Brush
- Scale: Fixed, 100%
- Spacing: 0%
- Fit: Approximate path (this keeps the rope neat around curves and corners)
- Colorization > Method: Tints, with the Key Color set to black
- Click OK. Your rope brush now appears in the Brushes panel.
Step 8: Use your rope brush
- Draw a path: a line, a circle, a frame, or several concentric circles.
- Select the path and click Rope Brush in the Brushes panel.
- Because you chose Tints, you can now change the stroke color and the rope changes color with it. In the tutorial video, the same rope turns pink or blue just by changing the stroke.
- Adjust the stroke weight to make the rope thicker or thinner.